Amble through Lisbon on a summer’s evening and you’ll be struck by two things. The first is the city itself. It’s a fascinating city. A real city. The second, is the smell of grilled Sardines carried on the warm breeze rising up off the River Tagus. If you can’t get to Lisbon, then why not try this stunning grilled Sardine recipe and turn your kitchen into little Lisbon for an evening.
(You might want to open your windows for this one, as it can get a little smoky – but it’s 100% worth it).
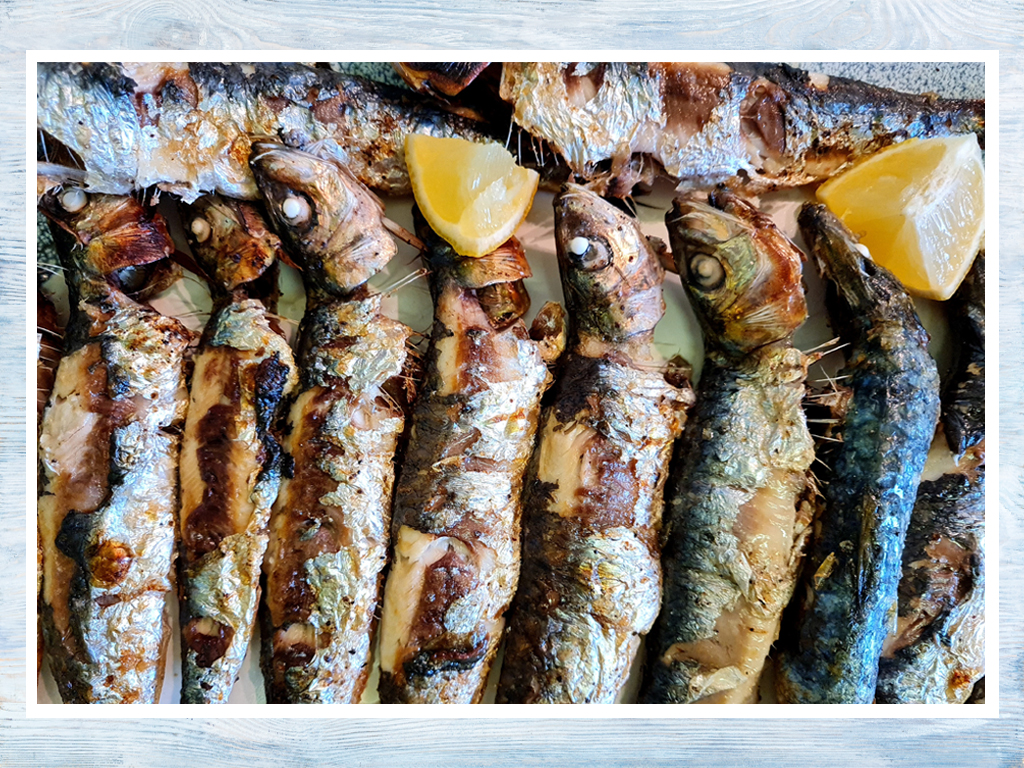

Portuguese Style Grilled Sardines with Homemade Mayonnaise
Description
This is a great late summer, early autumn recipe. It's quick, easy and super delicious.
We like cooking Sardines under a hot grill, but this recipe works well for the barbeque too!
If you'd like to know a little more about Sardines then read our guide.
Ingredients
For the mayonnaise
Instructions
Let's cook!
-
For the marvellous mayonnaise
Make sure you have a bowl, a spoon and an egg at room temperature. This is super important.
Drop a teaspoon of Dijon mustard along with the egg yolk into your bowl. Season with a little salt and gently mix together.
Once combined, add one or two drops of olive oil.
From this point on, do not stop stirring. Keep a steady pace, but there’s no need to go berserk.
Add the olive oil drop by drop to begin with, then more gradually as the mayonnaise starts to come together.
Again, keep the pace nice and steady. Continue until you’ve used all the oil.
Taste and season if necessary. If the mayo tastes too much of oil, add a squeeze of lemon.
And there it is - your very own homemade marvellous mayonnaise!
-
For the Sardines
Remove your Sardines from the fridge one hour before cooking (this is important!)
Gut and wash your Sardines. (A true aficionado would skip the gutting part). We don't skip the gutting part, but we do leave the heads on.
If you're not sure how to gut your Sardines, then watch this excellent clip on how to prepare Sardines.
Use kitchen paper to dry the fish and absorb as much moisture as possible. Set aside.
Pre-heat your grill to maximum to get it super hot 🔥
Give your Sardines another pat dry and then brush on both sides with a little olive oil.
Season the fish on both sides with a good whack of good sea salt. (We use Cornish Sea Salt - available to buy on Amazon).
Cover a baking tray with some foil and place under the grill rack. This will prevent a massacre of your oven.
Brush the grill rack with a little olive oil and place the Sardines on it.
Place under the raging hot grill for 2-3 minutes on either side.
It’s going to get smoky. So open all the windows!
What we're looking to achieve is beautiful crispy skin. To do this, we need to extract as much of the moisture from the Sardines as possible. This is why it's best to remove the Sardines from the fridge in advance of cooking. It's also worth using good kitchen paper when 'dabbing' the Sardines dry. Most importantly, you really need super fresh Sardines for this one. Once the fish begin to deteriorate the more moisture you'll get. And that's bad news. -
To serve
Serve with your beautiful homemade mayo and a squeeze of lemon.
Grilled Sardines are great with fries or a simple green salad.
If you want to be really authentic, serve with a roasted pepper salad.
Eat with your fingers and save on the washing up!
Dreamland 😍